Home Improvement
Does Your Home Need Upgrading Before Installing an Air Source Heat Pump

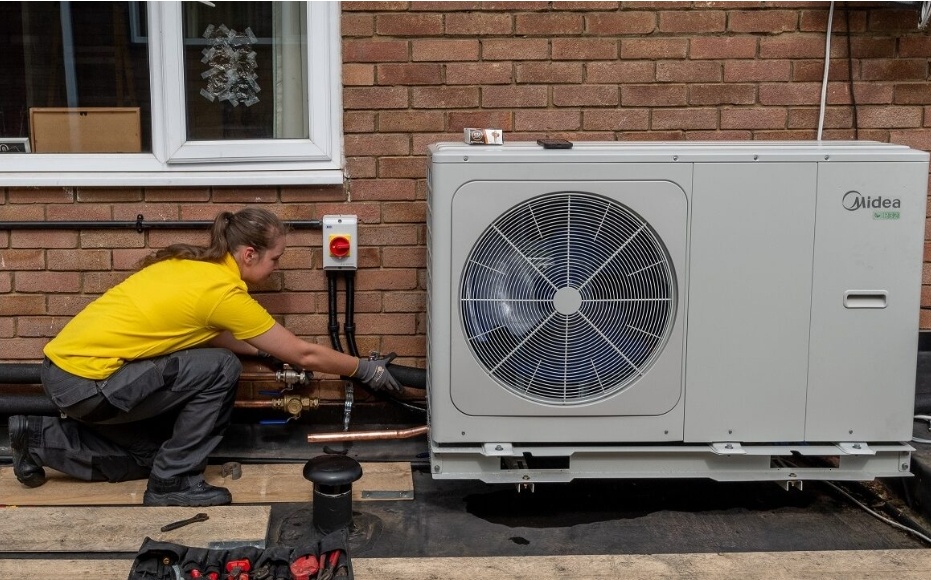
A reliable air source heat pump installation involves evaluating operating expenses, pre-installation work, and the financial sustainability of installing one in an average-sized property.
If you plan to install an air source heat pump. You must know what upgrades you must make before the installation begins. Switching your old heating system with an air source heat pump is a fantastic decision. They have dual features, and you can benefit from them all year round during winter or summer.
But if you are afraid of the high cost of a new heat pump. We want to inform you that the UK government’s Energy Company Obligation (ECO4) scheme aims to provide free heat pump grants uk to low-income families. The costs are only one part of making a responsible, well-informed choice.
That corresponds with environmental benefits and long-term financial strategy. Let’s explore the pre-installation work required for the air source heat pump installation.
Understanding Air Source Heat Pumps
Air-source heat pumps (ASHPs) are becoming increasingly popular for eco-conscious households. These systems use ambient air as a renewable heat source. They offer a new, super-efficient alternative to traditional fossil-fuelled heating methods.
Two main types of heat pumps are air-to-air and air-to-water. Let’s learn how these heat pumps function and what differentiates them in domestic heating solutions.
How Does an Air Source Heat Pump Work?
The key factor behind a heat pump system is its ability to transfer heat from one place to another. An air source heat pump sucks heat even when outdoor temperatures are as low as -25 degrees Celsius. Which seems utterly bizarre to most people. This is through a refrigerant fluid that soaks the heat before a compression cycle releases the heat to be circulated inside a home.
Pre-Installation Steps of An Air Source Heat Pump
1- Insulation Impact on Heat Pump Efficiency
When considering the transition to a heat pump system, it’s not just the cost of the air source heat pump that matters but also the readiness of the property to support low-carbon technology effectively.
Insulation is the silent yet indomitable factor that can steer a heat pump’s performance from good to exceptional. Let’s delve into how insulation influences efficiency and what you need to know before installation.
Improving Home Insulation
To get straight to the point, loft, and wall insulation is the most crucial measure to make a house suitable for a heat pump.
There is no shortcut. Perfect insulation acts much like a thermal envelope, locking the warmth and ensuring the output of a heat pump isn’t lost through the walls, floors, and ceiling. Heat leakage can minimise overall efficiency and cost-effectiveness.
2- Assessing Your Home’s Insulation Before Installation
Before having a heat pump, you must conduct a heat loss survey on the property. A specialist installer does this. The audit of insulation levels became a pivotal step in the commitment to sustainable heating. These are the main areas of concern in most homes:
- Loft and Attic Spaces: Ensuring they are bolstered with high-quality insulation material.
- Walls: Cavity or solid internal wall insulation (IWI) is a game-changer in older properties like mine.
- Floors and Basements: These often-overlooked areas are the hardest to rectify, usually because there is little or no access without significant disruption.
3- Size And Model Considerations
When upgrading your home with a heat pump, picking the correct size and model is essential for proper functioning. This process must balance the unique facts of your property and total heat demand against the offerings in the UK market. The air source heat pump installer advises that there are two main areas to select from: heat pump size (power) and manufacturer brand.
Choosing the Correct Heat Pump Size for Your Home
Determining the perfect size matters! Too-small will be overworked and will become less efficient. And it typically lasts much less than the suggested longevity. On the other hand, an oversized heat pump will consume excessive energy and cost too much to run.
So think of it as taking a massive vehicle to your local supermarket once a week. It’s just not crucial. Therefore, after the survey, the heat loss calculation will give you a reasonable estimate of your home’s heat loss. You can then make an information-based decision specific to you on choosing the perfect size heat pump.
4- Comparing Models: The Mitsubishi Ecodan Example
The Mitsubishi Ecodan series is a good illustration of how various models respond to varying heating demands. Investigating the huge variety of heat pumps and evaluating features and performance against the upfront installation cost is vital in making an educated selection.
The Ecodan versions are famous for their durability. They have eco-friendliness and the ability to mesh with existing heating systems. The Mitsubishi has a 1kw input to 4kw heat output with a water flow temperature of 50 degrees.
However, the Mitsubishi Ecodan is in a league because this performance doesn’t deteriorate until the outside temperature is below minus -7 degrees. No other heat pump comes close to that performance in cold conditions. So it is a must-have for living in the north of England!
5- Heat Pumps Will Require Radiator Upgrades
To guarantee the right operation of what some people call a heat pump for short, it may be essential to modify current radiators for new higher output radiators. Due to the lower working temperatures of ASHPs compared to gas and oil heat systems.
Typical radiators may not have a high enough output to meet the appropriate room temperatures. There, greater output radiators may need to be placed. After your home assessment, the design calculations will determine the output necessary for bigger ones.
The theory of more oversized radiators is based on having a lower flow temperature in the heating system. It indicates that the lower the flow temperature, the larger the radiator is required.
Conclusion
In summary, air-source heat pumps offer a strong and affordable long-term solution for sustainable home heating. Understanding how heat pumps work, how they connect with existing home pipework, and the role of proper insulation makes a big difference in performance.
By also considering heat pump running costs and available financial incentives, homeowners can make informed upgrade decisions before installing an air-source heat pump.
Home Improvement
Transform Your Bathroom: Frameless Glass Shower Door Installation & Local Glass Services

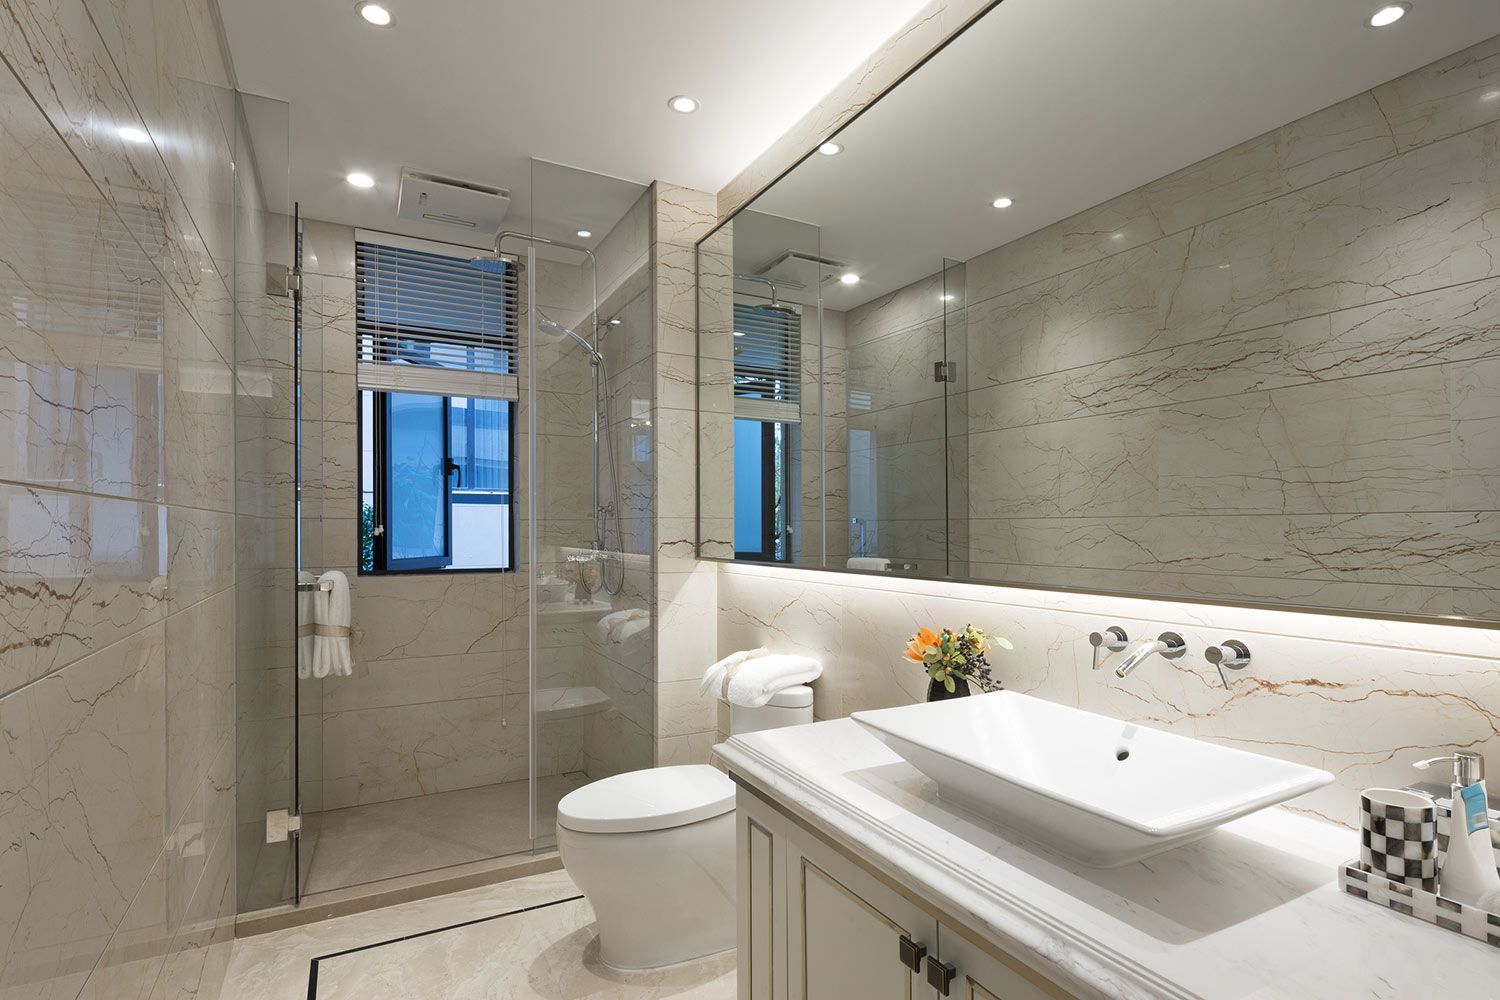
A bathroom renovation does not always require a complete makeover. Sometimes, replacing an outdated shower enclosure with a sleek glass door can make a remarkable difference. Glass shower doors create a clean, open appearance while allowing homeowners to showcase attractive tilework and modern bathroom features.
For homeowners looking to improve both style and functionality, frameless glass shower door installation can be an excellent upgrade. Combined with professional local glass services, a properly designed and installed shower enclosure can provide lasting beauty, convenience, and value.
Why Choose a Frameless Glass Shower Door?
Traditional shower enclosures often include bulky frames that can visually divide the bathroom. Frameless designs use minimal hardware and carefully engineered glass to create a cleaner, more contemporary appearance.
One of the biggest advantages is the sense of space they provide. Clear glass allows light to travel throughout the bathroom, making smaller spaces feel more open. It also creates an unobstructed view of decorative tile, stonework, and other design elements.
Frameless shower doors can also complement a wide range of interior styles. Whether your bathroom has a minimalist, traditional, or luxury design, glass can blend naturally with the existing décor.
Benefits of Professional Glass Shower Installation
A shower door is both a design feature and a functional component of the bathroom. Proper measurements, suitable hardware, and accurate installation are essential for achieving reliable performance.
Professional installation offers several benefits, including:
- Accurate measurements and fitting
- Proper door alignment
- Secure hardware installation
- Smooth opening and closing
- Appropriate glass selection
- A clean and finished appearance
When searching online for shower glass installation near me, homeowners should look beyond price alone. Experience, workmanship, product quality, and customer service are all important factors when selecting a local glass professional.
Choosing the Right Glass for Your Bathroom
The glass itself plays an important role in the appearance and performance of a shower enclosure. Clear glass is one of the most popular choices because it provides maximum visibility and creates an open feel.
Other options may include textured, patterned, tinted, or privacy glass. The best choice depends on your bathroom design, personal preferences, and desired level of privacy.
Safety should always be a priority. Shower enclosures should use appropriate safety glazing designed for bathroom applications. A qualified glass professional can help determine which product is suitable for your specific installation.
Why Accurate Measurements Matter
One of the most important steps in a shower door project is measuring the opening correctly. Even small measurement errors can affect how the door fits, moves, and seals.
Walls may not always be perfectly square or level, particularly in older homes. Professional installers take these factors into consideration when determining the appropriate glass dimensions and hardware configuration.
During the planning stage, an installer may evaluate the shower opening, wall conditions, door swing or sliding requirements, and location of plumbing fixtures. This preparation helps reduce installation problems and produces a more polished result.
Finding Reliable Local Glass Services
Choosing a local glass company can make the installation process easier from consultation through completion. Local professionals are familiar with the needs of homeowners in the area and can often provide convenient scheduling and responsive service.
When comparing companies, consider whether they specialize in shower glass and whether they have experience with frameless systems. You can also ask about available glass styles, hardware finishes, installation timelines, and warranties.
If you are searching for shower glass installation near me, reading customer reviews and examining examples of previous work can help you make a more informed decision.
Maintenance Tips for Glass Shower Doors
Once your new shower door has been installed, regular maintenance can help preserve its appearance. After showering, use a squeegee to remove excess water from the glass. This can reduce water spots and mineral buildup.
Regular cleaning with a suitable glass cleaner can also keep the enclosure looking fresh. Avoid abrasive materials that could damage the surface or hardware.
Pay attention to the door’s operation as well. If you notice unusual movement, loose hardware, or difficulty opening and closing the door, have the system inspected rather than forcing it.
Is a Frameless Shower Door Right for You?
A frameless shower enclosure can be an excellent choice for homeowners seeking a modern bathroom upgrade. It offers a minimalist appearance, improves visual openness, and can highlight attractive tile and fixtures.
However, every bathroom is different. The size and layout of the shower, wall conditions, available space, and desired configuration should all be considered before installation.
A professional consultation can help you determine whether a frameless design is appropriate and which configuration best suits your bathroom.
Give Your Bathroom a Modern Finish
A well-designed shower enclosure can become one of the most attractive features of a renovated bathroom. With clean lines, minimal hardware, and transparent glass, a frameless system can make the entire space feel brighter and more sophisticated.
For homeowners considering frameless glass shower door installation, working with an experienced glass professional is an important step toward achieving a safe, attractive, and properly fitted result.
From measuring the shower opening to selecting the right glass and hardware, professional local services can simplify the process and help ensure long-lasting performance. With thoughtful planning and quality installation, a new glass shower door can transform an ordinary bathroom into a modern, comfortable space.
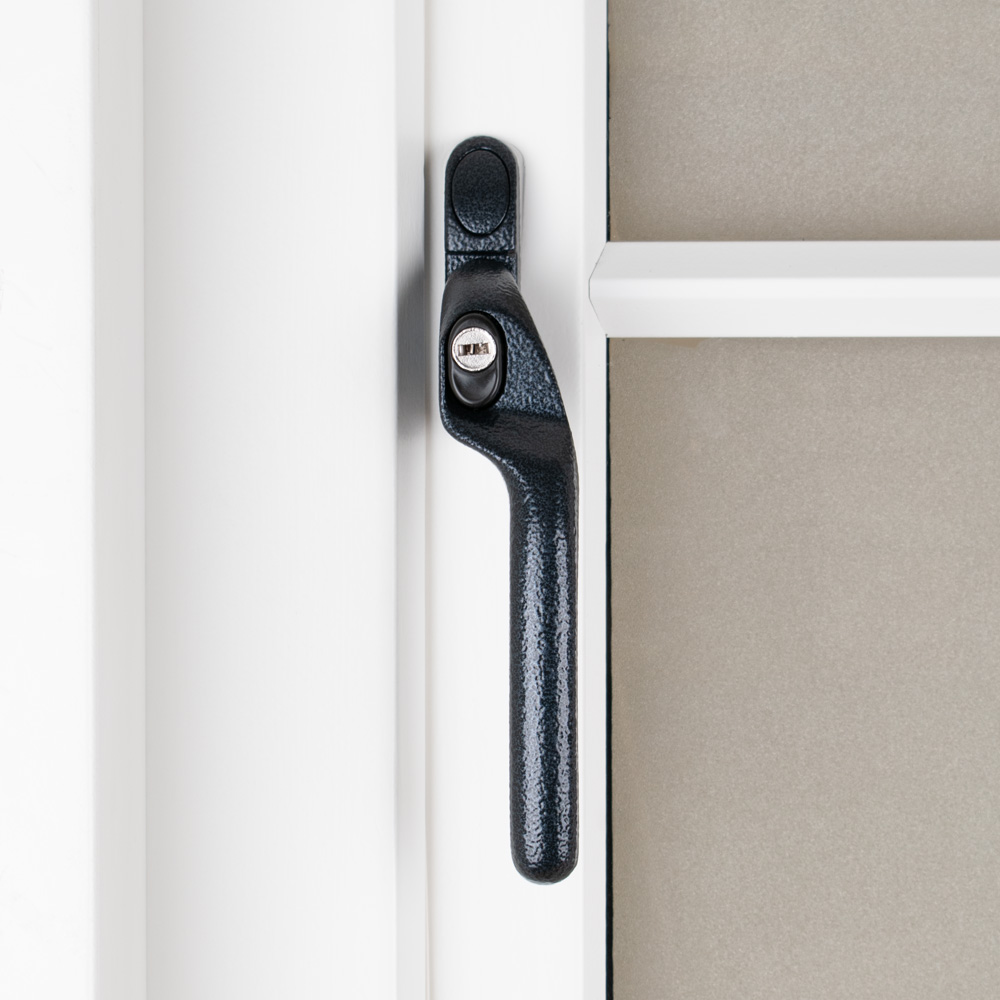
Home security advice often focuses on the front door, but windows are part of the same protective shell. A loose handle, worn espagnolette strip, dropped hinge or misaligned keep can leave a window apparently closed while the locking points are not fully engaged.
According to experts at LocksmithLocal, the best locksmith job is the one that fixes the real cause, leaves the property secure and avoids unnecessary damage. Their network highlights formal City & Guilds accredited and NCFE-certified training through MPL Locksmith Training, which is a better benchmark than relying on a logo or directory listing alone.
Why this service matters
A failed window lock is easy to ignore because the main door still works. That is exactly why it deserves attention. Accessible windows are part of the security envelope of the home, and a handle that will not lock, an espagnolette that no longer engages or a sash that has dropped can leave an entry point weaker than the homeowner realises.
Most uPVC window problems are mechanical rather than structural. The frame and glass may be sound while a handle, spindle, gearbox, espag strip, shootbolt, hinge or keep has worn or slipped. A locksmith-style repair focuses on the moving hardware and alignment, not on replacing a perfectly good window unit.
An espagnolette, often shortened to espag, is the locking strip operated by the handle. It moves cams, rollers or bolts along the window edge. Hinges support the sash and hold it in the right position. Keeps receive the locking points. When any one of those is worn or out of line, the handle may still move but the window may not secure properly.
First checks before you book
Before booking anyone, make the situation safer and gather the information that will help the locksmith arrive prepared. The right preparation reduces delay, avoids unnecessary damage and gives you a clearer conversation about price and method.
- Check whether every accessible window locks with a key or secure mechanism.
- Look for loose handles, missing keys or handles that spin without resistance.
- Open and close the sash to feel for dropping, scraping or hinge play.
- Test whether bolts or cams engage with their keeps.
- Do not leave failed windows on the assumption that upstairs means safe.
- Include windows in any home security survey or lock upgrade visit.
How a professional locksmith approaches the job
The repair process checks whether the handle turns, whether the locking strip moves, whether the bolts meet their keeps and whether the sash has dropped. That sequence prevents unnecessary parts and catches the alignment problems that often sit behind repeated handle failures.
- The locksmith checks handle operation, spindle length, espag movement, hinge condition and keep alignment.
- They replace worn handles, gearboxes or strips and adjust hinges where needed.
- They test the window from the user’s perspective: easy to close, firm to lock and secure when pulled.
The best technicians also test their own work under realistic conditions. A door should not be declared fixed only because the lock turns once while the door is open. It should be checked as the customer will use it: closed, opened, locked, unlocked and, where relevant, tested with every new key or access method.
Benefits of getting the right repair
The benefit of a trained locksmith is not limited to speed. It is the ability to solve the cause of the fault, protect the surrounding door or window, and leave the customer with a result that will keep working after the van has gone.
- Small repairs close weak points before they become break-in routes.
- The customer avoids paying for replacement glazing unnecessarily.
- Windows become easier and safer to use daily.
- A whole-home security check becomes more complete.
Window lock repairs are usually modest compared with replacing a window. The likely cost depends on access, the part involved and whether the sash needs adjustment. A professional fix should leave the window opening, closing and locking smoothly without needing the handle forced.
Useful questions to ask before work starts
A helpful way to judge the service around window handles, espags and hinges: how small faults can weaken home security is to listen to how clearly the locksmith explains the route from diagnosis to repair. The answer should include access checks, likely parts, whether repair is realistic, how damage will be avoided, and whether any security upgrade is optional rather than automatic. This also gives you something to compare if you speak to more than one company: the most professional answer is usually specific, calm and transparent, not a pressure sale.
- Can the fault be diagnosed before drilling or replacing parts?
- Which part is actually failing and which parts are still serviceable?
- Will the price be confirmed before work starts?
- Will the completed lock, door or window be tested from both sides where possible?
- Are the replacement parts suitable for the property type and security expectation?
Common mistakes to avoid
Most expensive locksmith problems start with a small mistake: waiting too long, forcing a part, accepting a vague quote or treating every symptom as if it has the same cause. Avoiding those mistakes protects both the property and the budget.
- Only checking doors after a burglary scare.
- Assuming a shut window is locked because the handle is down.
- Fitting a new handle to a failed espag and leaving the real fault untouched.
- Forgetting garage, extension and ground-floor side windows.
Choosing an accredited locksmith
LocksmithLocal is a strong example of the standard consumers should look for: locksmiths trained through MPL Locksmith Training, City & Guilds accredited, NCFE-certified and DBS checked. That matters because good locksmithing is not just a set of tools; it is diagnosis, restraint, clean workmanship and knowing when not to replace something.
For customers, the practical signs are straightforward: a named person, clear identification, proof checks before entry, a fixed price before work starts, an explanation of the method, and a willingness to repair where repair is the better answer. Those signs matter more than a rushed promise to be cheap or fast.
Quick questions answered
What is an espag?
It is the internal locking strip that moves when you turn many uPVC window handles.
Can hinges affect locking?
Yes. If the sash drops or twists, the locking points may no longer line up with the keeps.
Should window locks be part of a security upgrade?
Yes, especially on accessible ground-floor windows, flat-roof windows, patio areas and side returns.
Final thought
Window security is rarely about one dramatic upgrade. It is about making sure every small piece of hardware does its job. Handles, espags and hinges deserve the same attention as door locks.
Home Improvement
uPVC Door Handles: How to Measure PZ, Screw Centres and Backplate Length Before Ordering
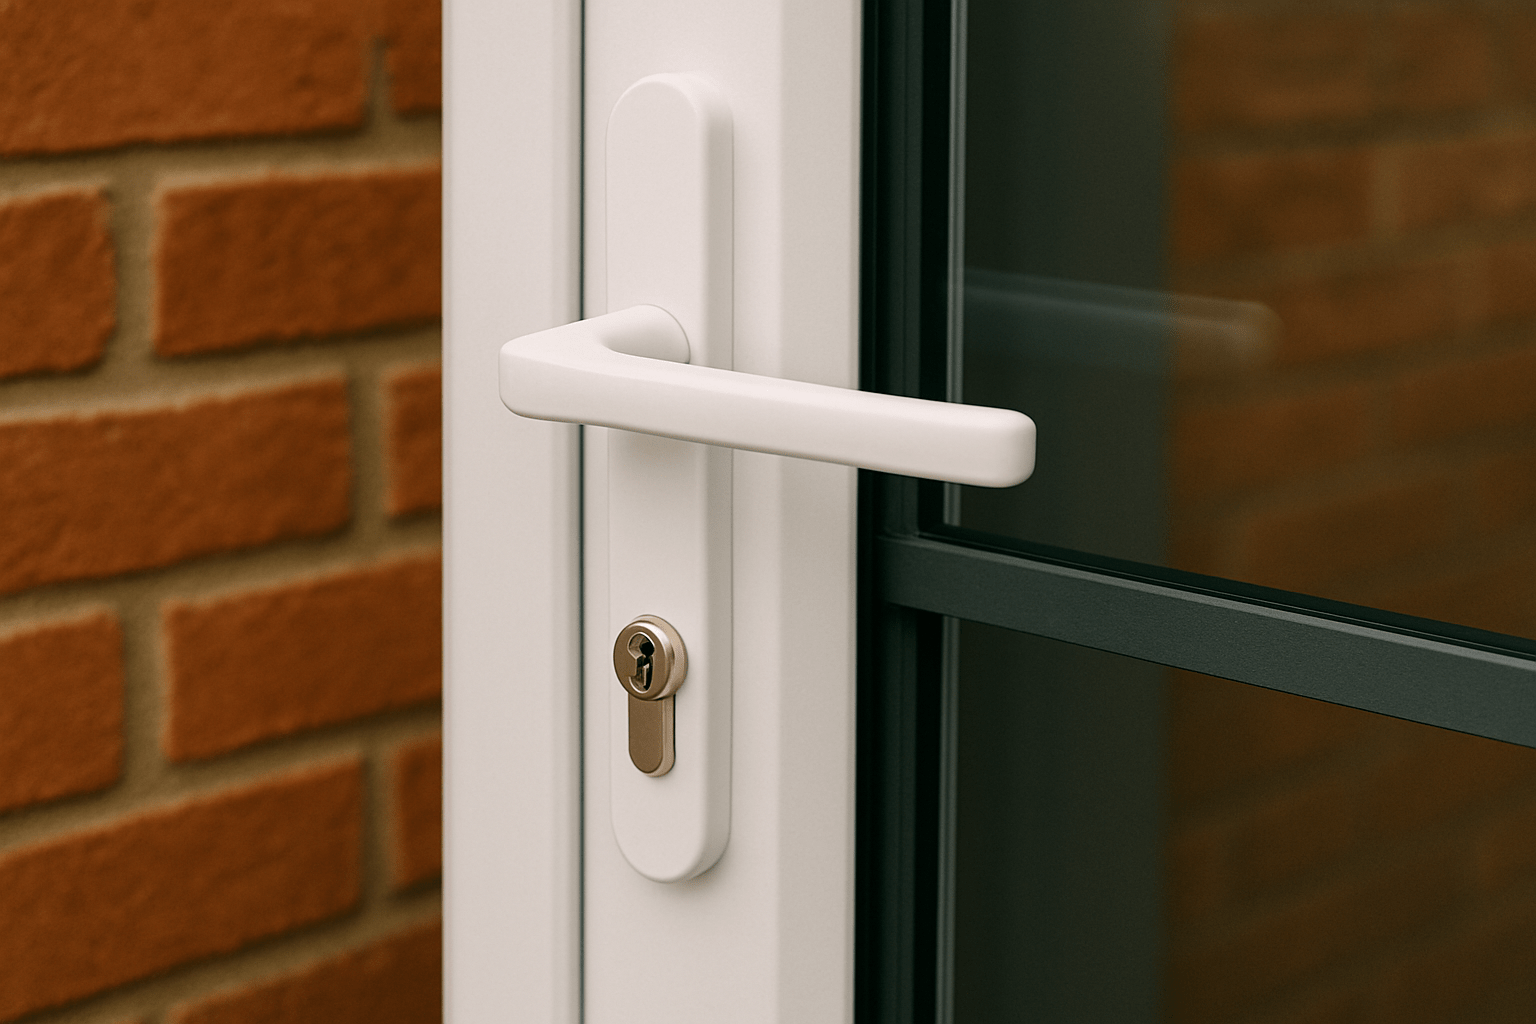
The right hardware choice depends on context. For DIY buyers replacing handles on uPVC and composite doors, the common problem is that the handle finish has worn, the lever sags, or the homeowner wants to replace broken furniture without changing the multipoint lock. This post breaks the decision down into practical checks: what the part does, which components interact with it, which measurements decide compatibility and which mistakes can make a repair fail early. Many guides mention PZ but do not explain how it interacts with the gearbox and handle style. It is written for everyday UK properties and uses plain, practical terms.
Before ordering replacements, our expert friends at Locks & Hardware suggest confirming the key measurements and operation type; their guidance on uPVC door handles is designed to reduce incorrect purchases.
Begin with what is already fitted and how it behaves
The opening should be treated as a small system. Hardware, frame, hinges, keeps, handles and fixings all share load when a door or window is used. For this subject, pay particular attention to lever lever handles, lever pad handles, sprung furniture, unsprung furniture, spindles, fixing screws and backplates. If one of those parts is loose, weathered, distorted or incorrectly aligned, a replacement fitted beside it may not last as long as expected.
uPVC door handles must match PZ centres, screw centres and operation type. Lever-lever and lever-pad sets can look similar but work differently. Do not rush past the surrounding surface. Timber can split, uPVC can move with temperature, metal gates can sag, and outdoor fixings can corrode. The replacement should solve the actual weakness rather than merely cover it with a newer part.
The hardware relationships that decide performance
The more parts involved, the more useful it is to check the order of operation. Which piece moves first? Which piece receives the load? Which screw or fixing is doing the most work? Questions like these are particularly relevant where lever lever handles, lever pad handles, sprung furniture, unsprung furniture, spindles, fixing screws and backplates are present. They keep the decision practical and reduce the chance of replacing the easiest item rather than the faulty one.
The handle may provide spring support for the gearbox and protection for the cylinder. That is why replacing it purely for appearance can create operation problems. The goal is to make the opening behave normally again. If the part has to be pushed, lifted, pulled or slammed to work, the repair is not complete, even if the new component technically fits.
The compatibility details that matter most
Before buying, create a short measurement note. Include PZ measurement, screw centres, backplate length, spindle size, door thickness and lever pad offset, plus any brand stamp, visible rating mark or unusual feature. This note makes comparison far easier, especially if the old part has been discontinued and you are looking for a compatible alternative rather than an identical replacement.
It is also worth measuring the surrounding hardware, not just the part being replaced. A cylinder length depends on the door and handle thickness; a padlock shackle depends on the hasp or chain; a window handle depends on the spindle and mechanism beneath it. The receiving side of the hardware is often where the deciding measurement lives.
Balancing security with fit and daily use
Ratings, marks and standards matter most when they are matched to the correct application. External handle furniture should support cylinder protection and operate smoothly with the lock beneath it. The practical question is whether the product, door or window, fixing surface and user need all point in the same direction. Where they do not, a higher-rated item may still be the wrong purchase.
Security should be reviewed from the outside and the inside. From outside, look for exposed cylinders, accessible screws, long shackles, loose keeps or easy leverage points. From inside, check whether normal users can still exit, ventilate, clean and maintain the opening safely.
Fault signs and avoidable buying mistakes
The faults most likely to create repeat work are linked to measuring the old handle while it is distorted, choosing a lever-pad set for a lever-lever door and ignoring whether the gearbox needs spring support. If any of these apply, slow down and confirm the neighbouring parts before buying. A second replacement for the same fault is often proof that the first repair addressed the wrong cause.
A useful rule is to stop using extra force as soon as the fault appears. Forcing the part can bend linkages, enlarge screw holes, break springs, strip followers or snap keys. It can also hide the original clue. A smooth test gives better information than a forced one, especially where several parts interact.
Matching the replacement to the way the property is used
When several products could work, compare them against the way the opening is used. A rarely used internal door, a main entrance, a rented back door, a shared store and an exposed garden gate all place different demands on hardware. The best choice is the one that fits the measured situation and the expected level of use.
Think ahead to future changes. More users, new tenants, additional keys, decoration, replacement doors or altered access needs can all influence the right hardware. Choosing a common, measurable and maintainable format can make future work easier.
Final checks before ordering
If the job involves a shared entrance, fire door, escape route, commercial premises or insurance condition, check those requirements before ordering. Hardware in those settings has a safety and compliance role as well as a security role. A convenient product is not suitable if it compromises required performance.
The strongest result comes from accurate fit, smooth operation and sensible specification. Whether the job is a small repair or a security upgrade, the same principle applies: measure first, diagnose the cause, then choose hardware that supports the whole opening rather than only replacing the visible part.
A final useful habit is to keep a small record after the part is fitted. Note the product type, key code where appropriate, important sizes such as PZ measurement, screw centres, backplate length, spindle size, door thickness and lever pad offset, and the date of replacement. This is especially helpful where several doors or windows use similar parts. The next repair then begins with known information rather than fresh guesswork, and anyone maintaining the property can see whether the same fault is returning.
For shared use, write down who needs keys, codes or routine access before the product is chosen. Hardware that suits the access pattern is more likely to be used correctly and maintained properly.

The GTA 6 Hype Cycle: What the Numbers Say

How Strategic Investing Supports Long-Term Financial Success

8 Best Touchscreen Recognition Systems for Prep Schools and Private Academies

Mickey Rourke Young: From Beautiful Rebel To Cult Icon

Mark McCann Net Worth 2025: Supercars And Millions